Pages

Tuesday, July 30, 2013

cut the clutter

No discipline seems pleasant at the time, but painful. Later on, however, it produces a harvest of righteousness and peace. Hebrews 12:11

I'm in a serious fight... with all of my junk. It's tying me down! I feel like I just want to break away from it all and scream and have it gone. But alas, I am sorting and torturing myself over what to do with  the things I have amassed over my 26 years of existence. I think back to all the times that I have de-cluttered and how I rarely think about or miss the things that I did away with. And then I see all of my things. And I have fantasies about a clean and organized house in which I have every single thing I could possibly ever need or own, neatly tucked away in it's own labeled spot in an uncluttered/nonjunky cabinet (oh heyyyyyy OCD). And then I look at my stuff and snap out of it. At this point in the process, I have faced the truth. All of this stuff, is just stuff. I started this blog to keep track of my business happenings, moving, getting married, renovating a house, budgeting, decorating, etc but along the way, I want to know that I am not alone. I am human and so are you. I think. Or at least, hope. So I am on a mission to cut the clutter and get back to the things that really matter. 

 The junk has got. to. go. 

Most important in this process for me is perspective. I constantly remind myself that these things are just things. Don't get me wrong, I LOVE to hang an antique dish on the wall, frame an old print from my grandparents, use a dresser that belonged in my family beach house and on and on and on. This is the part of the process I love. The part I don't love, knowing that I can't keep everything. Nor should I need to. Or want to for that matter! We shouldn't be tied to our memories with stuff

Hanging one of my grandmother's old paintings in our master bedroom = good
Having a drawer/closet/attic/garage full of junk and basically garbage old stuff that no one will ever get to know about or see in the future = not good

Of course, I'm not just battling with things that can be easily donated here. For instance, tonight I found stacks and stacks of birthday, graduation, Christmas, etc cards in my old dresser. I obviously don't have the heart to toss these (OMG, you Scrooge!) so I'll turn to trusty ol Pinterest for an idea on keeping them. But, I don't need that last four inches of wrapping paper that I might possibly use on the world's tiniest gift or the stubby colored pencils left behind in my desk drawer because they have always been there and I couldn't possibly throw them away and put something else in their designated spot?! So as we prepare for the move (have you found the common theme of the blog?), I am untying the strings that have been binding me to this baggage. I don't want the start of my life with the Mr. to be one that is focused on things or every single aspect of a past life. I want us to have a life that is focused on each other and the relationship in our marriage that we build together. 

A friend shared this link a few weeks ago and I immediately read/loved/reread/obsessed over it. 
http://www.butlerpartyof2.com/2012/07/being-godly-wife.html

I think my theme tonight goes hand in hand with this advice written by Danielle over a Butler: party of two. By focusing less on things (junk in your house, old memories, best shoes, best car, etc, etc, etc), we can focus more on the relationships in our lives. I already feel better just thinking about ridding the garbage that clogs our house, our routine, our lives, but I know it will take work. It won't be fun, but I know it will be worth it. So, today, I am thankful for this precious little house. And for the husband I'll be sharing it with. And the two maltipoos that we have together. And my amazing family that is just a stones throw away (no matter which way you throw the stone).


If you are anything like me, revelations such as this are great and everything, but to feel like a productive member of society, you just need to do something. A purging of sorts, to make you feel like this revelation has actually translated to the visible clutter. That is why today I am sharing with you my quick and easy spice cabinet makeover!

This is what I started with. Before, we had a really sophisticated system in which we stored our spices in the cabinet... they were randomly thrown into tupperware and shoved on a shelf. Nice, I know. So no matter how this project turned out, it would be an improvement based on our past spice transgressions. 

I found these bad boys at World Market, buy one get one free! They have a clear top, spin lids to shake or pour and magnets on the back. Plus, they are this cute turquoise color. I don't think we could've done any better. 

Classy, huh?

All I needed was a Sharpie marker to label the clear lids and, luckily for me, I had these cute metallic ones I recently got for another project. 

Ta da! Pretty simple, huh? I love these containers because they are big enough to hold the contents of the large size spice containers without having any left over. Once we are all moved, we'll have magnets mounted on the back of two kitchen cabinet doors where we'll stick these! I saw on Pinterest that someone added small hooks to store their teaspoons/tablespoons for easy measuring. Umm, definitely doing that. I'll be sure to share the final step once we have these hanging up in their new home. I feel better already after tossing those mismatched/different sized/different shaped spice containers. I give this project an A+ for convenience, cost and style. 

Have you done any quick and easy projects that made a great transformation, while also ridding your life of clutter? I want to hear about it!

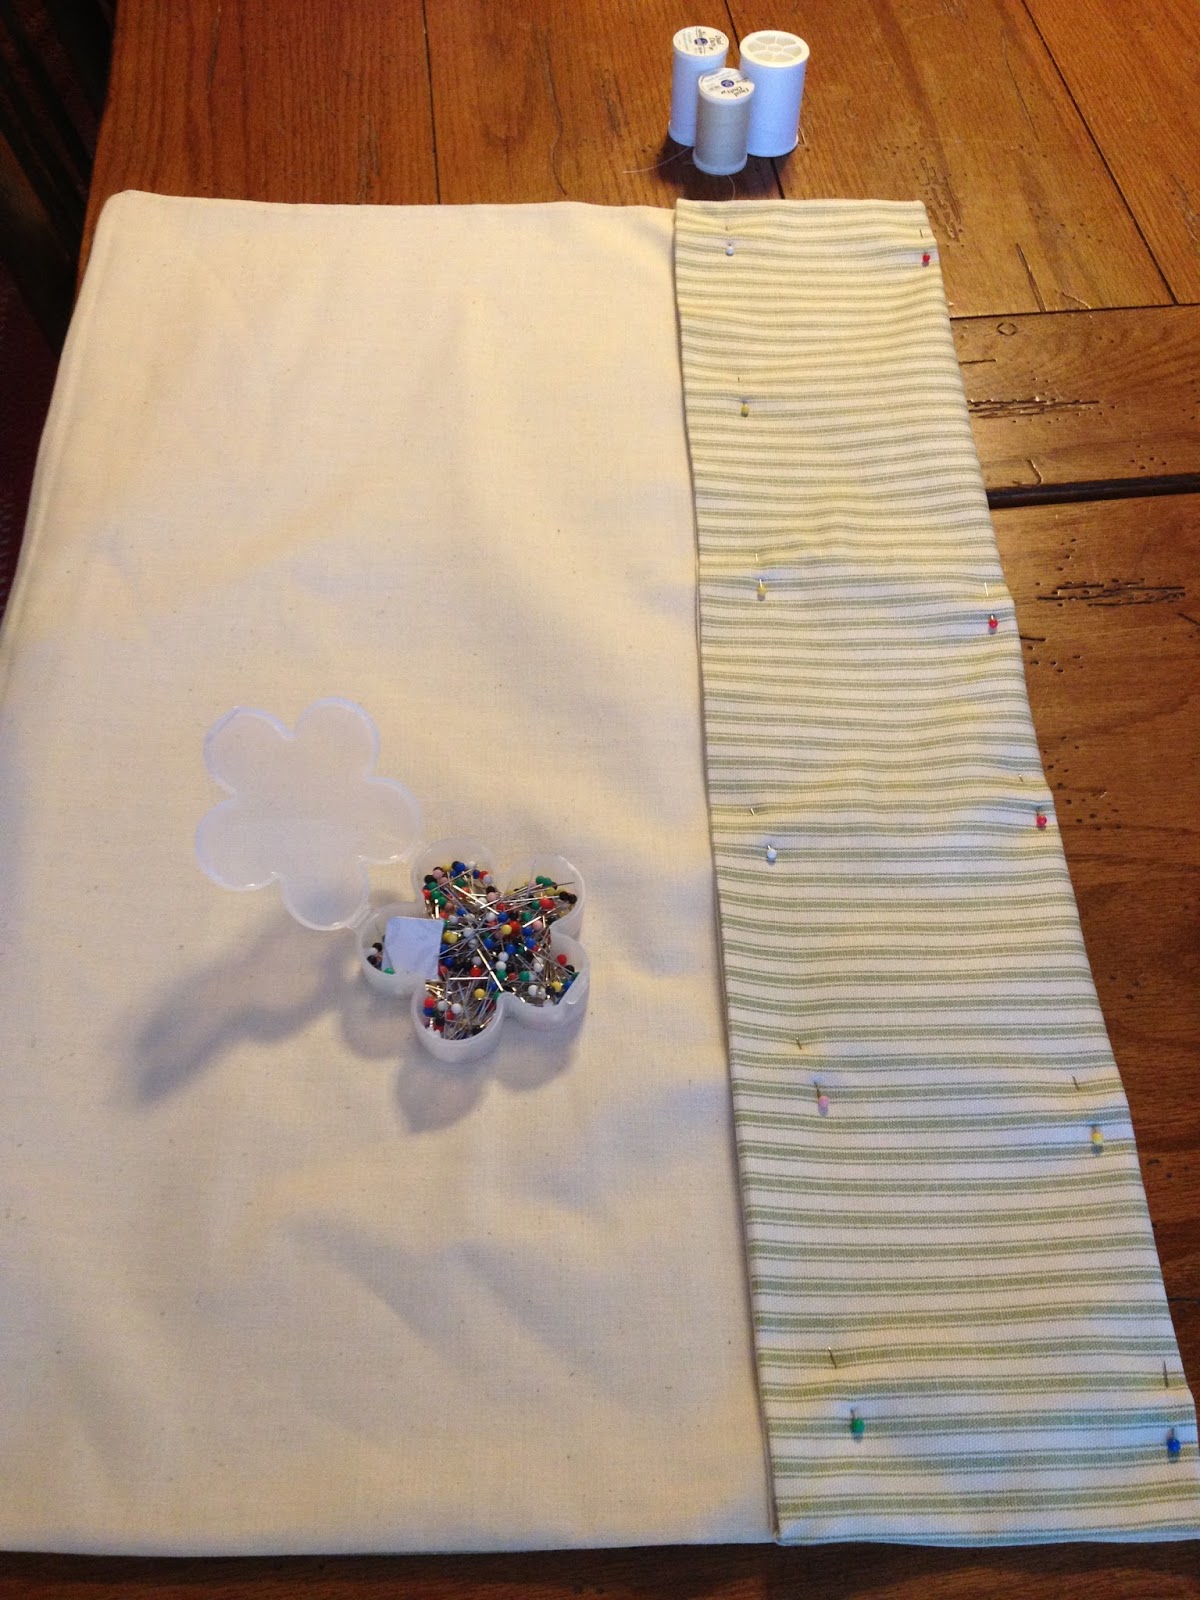
PS. Super mom pointed out that I misspelled the word 'selvedge' in the post about my DIY curtains. She then shared with me the correct spelling, which I immediately forgot because I was working on something else. So today, I tried to google it. Yall, at least four different spellings came up. So here today, I want to confess to my misspelling and say that I do not know how to spell this particular word. Still. Sorry, Mom!

Thursday, July 25, 2013

finding the valance

And God is able to bless you abundantly, so that in all things at all times, having all that you need, you will abound in every good work . II Corinthians 9:8

At this point in time, my morning routine consists of walking downstairs, fixing a cup of coffee, then asking Mom what my project of the day should be. Since we're still a bit off from moving (in case you have had the horrible circumstance of this being my first post that you've read, I suggest starting at the beginning), I'm trying my very hardest to get done all the interior design projects that I can tackle without actually living in the house. 

Today, we deemed that project to be textiles. 

Last weekend, Charlie and I picked out a new duvet for our master bedroom from Pottery Barn. We had gotten a handful of PB gift cards as wedding gifts, so this upgrade didn't cost us a thing! And it was on sale, yes! This morning's mission was to find fabric that we could use to make coordinating pillow shams. After ransacking Mom's seemingly endless supply of fabric around the house, we found half a dozen options that we spent the better part of the morning arranging, rearranging and arranging again. We finally settled on our picks! Of course, I'll be sharing pictures of the patterns that we chose and how I've sewn them all, but I wanted to wait until I could share the full master renovation with yall. So more on that to come later!

But I won't leave you hanging! In the mean time, I decided I would start with a simple project to get me warmed up on the sewing machine. I monogram on a regular basis, but it has probably been more than a year since I've sewn anything myself. My mission: cafe curtains for our kitchen window! Mom practically insisted on a valance for this bitty window, but there is just something about a cafe curtain that I love. The clean lines. The delicate rod. Those tiny little hooks. (Insert long sigh here!) I vetoed her decision. The cafe curtain won, and it was time for me to make it. 

Mom very casually pulled out a large bolt of green ticking and said I was welcome to use that if I'd like. Seriously?! I shouldn't have been surprised... so I took the fabric and didn't ask any questions. And don't you worry, there was plenty of other fabric that I could use to make the curtain lining. I gathered all my supplies and got started!

I started by measuring the window to get the numbers I'd need for the length and width for my curtain fabric (face and lining). Mom says the standard for a curtain pattern is triple the window width (that way your final result doesn't look skimpy). In my particular case, I didn't anticipate closing the curtain that often so I decided double the width would be fine. The end result would hopefully be a nice curtain to soften things up a bit, without looking too bulky in the little window frame. 

I cut the lining and the face down to the correct sizes. Mom had to remind me to cut off the selvedge, so don't forget that part!

I used the straight edge of my lining as the 'pattern.' I lined it up along what would be the top of the curtain and sewed that piece first.

Next, I pinned each side and sewed what would be the sides of the curtain. 

Lucky for me, my pattern had stripes and was easy to keep straight. Here, I have sewn the top of the curtain and am working on the sides. 

Here, I'm finishing up what will be the sides of the curtains. 

I trimmed off the edges and flipped that bad boy so it was right side out. 

Using a needle is a good way to get your corners out nice and tight. Otherwise, the fabric stays all tucked in and wadded up after you flip it. 

I pulled my seams tight and ironed them down flat to make sewing my last seam easy peasy!

By ironing the seam, all I had to do was follow along the straight line with my sewing machine needle. This ensured a nice even hem on my final product. 

All ironing complete!

Now, I measured my perfectly straight rectangle of fabric and hemmed my final and bottom seam so that my curtain would hang evenly in the window sill. 

Now I'm all pinned up and ready to sew. I decided to pin both sides of my hem, although I'd only be sewing in one place. I did this because I didn't want to chance the fabric moving under the foot of my machine thus overlapping along the final edge. This was important because any excess would've shown around the face of the curtain. Eek! It makes me queasy just thinking about all of my hard work going to waste!

Here I am following my nice straight/ironed seam to create the final hem. My measurements worked out perfectly so that my cafe curtain would hang just right!

My final product is pressed and ready to be hung.

But, I don't live in the house where these curtains will hang... Sad... So I rolled them up and tucked them away so that they are all done and ready to go once we are moved in the little house!

That is, after I took a few pictures, of course! This clearly is not a cafe curtain/rod/curtain placement, but it does give the idea of how they'll look once they are up. 

They are a little stiff, but they are also fresh off the ironing board so I'm hoping the fabric will rest a little. I also worried a bit about the thick hem at the bottom. I asked Mom her opinion and she says that a thick hem is a sign of quality sewing. Who knew?! 

The best part of this project is that it was entirely FREE! Mom had all the materials on hand that I needed so I just had to browse through her stock. I'll have to buy an interior mount cafe curtain rod and the small hooks once we are moved in, but I'm still considering this a huge cost-saver! 

There's still so much to do once we get moved in, but I'll keep shopping around in Mom and Dad's house for free or nearly free projects in the mean time!


Wednesday, July 24, 2013

oh (almost) happy day!

Consider it pure joy, my brothers, whenever you face trials of any kinds because you know that the testing of your faith develops perseverance. Perseverance must finish its work so that you may be mature and complete, not lacking anything. James 1:2-4

With high hopes we'd start moving into the house this past weekend, we were absolutely elated to find out that Lis and Matt's new house has PASSED THEIR INSPECTION! Woohooooo (Vicki Gunvalson anyone?!) Less than two hours later, our dreams were crushed when we found out it would be two more weeks before the little house was ours for the renovating. Unfortunately, there are some issues that need to be corrected in the big house before Matt and Lis will be moving in. But... I picked my jaw up off the floor and moved it right along. I've been busy with various little projects to pass the time until we can pack up and settle in. Guess what I'm going to share with you today?!

Operation: Dresser Renovation
Thrifty ol' me found this dresser while we were living in Byrnes Down at a yard sale for $40. But I didn't pay $40, I paid $25! With big dreams and high hopes, I drug Charlie around the neighborhood to pick up my find. It was hideous and it was all mine. 

After looking around the glorious world wide web and exploring multiple DIY blogs and websites, I was ready to get started. I gathered my supplies... 

various grains of sandpaper
plenty of paintbrushes
wood putty
putty knife
Pinesol
five gallon bucket
old rags
shop vac
shellac based primer
desired paint color
new hardware for my drawers
wood glue
wood clamp

If you plan to use the same hardware or hardware that has the same foundation (one hole vs. two holes vs. wide set vs. narrow set), you can skip the putty knife and wood putty. Lucky you!

I wish I had taken the time to get a better before picture. Y'all, this thing was ugly! That oak stain circa 1990 had. to. go. But I paid the $25 because I knew this chest of drawers was legit. To prove it, super Mom made tell her all the ways I knew it was a worthy investment. 
1. solid wood 
2. dovetail drawers
3. partitions between the drawers (Okay, fine, I didn't know this was good. Mom had to tell me this one). 
My favorite thing about the piece was the slight convex shape of the top three drawers and the slight concave shape of the bottom three. You hardly paid any attention at all to this feature when it was wood, but it was beautiful!

So I took the drawers out and vacuumed the whole thing. This was important because I'd been storing this baby in the garage and it had all kinds of yucky on it. Drawers, shell, everything got vacuumed. 

Next, I mixed up some water straight out the spigot with a little pinesol. With an old rag, I wiped down every single surface and put everything in the sun to dry. By no means was my rag sopping wet (I didn't want the wood to soak up all that water), but it was definitely wet enough to give it a good wipe down. 

One of drawers was a little loose at the joint, so I put a little wood glue down and held it overnight with a clamp. 

I decided to use different hardware than what was original to the piece, so I filled in the previous holes that I wouldn't need with my wood putty and putty knife. I let this dry overnight. The next day I sanded down the excess and used super coarse sandpaper to scuff the finish. 

I applied two coats of this Zinsser shellac based primer to get a nice solid coverage over the wood stain. The shellac primer is definitely more of an investment, but I have found that it really covers and seals the surface, resulting in a smoother finish of the final product. 
I hoped that the two coats of primer would let me sneak by with only one topcoat, but I ended up going ahead and doing a second. There were only a few areas to touch up, but I figured that if I had spent the time and energy to make it this far, why not take another hour or so to really do it right?!

After finishing up the new paint job, I took everything inside out of the South Carolina humidity. I let it rest for a day and took to lining the drawers. I did a little research, again on DIY blogs and websites, and decided that I'd find some cute paper and use and adhesive to make the drawer liners. For the first time during this project, I let Charlie have some input. We ended up with sock monkey lining. Shall I say more?

I was drooling over the different glass knobs at Anthropolgie, but I snapped out of it and found these that were almost identical for less than half the price at Nadeau in Mount Pleasant while browsing Sunday afternoon!

All in all, I paid less than $100 for this entire project which is great considering what a new chest of drawers costs these days! 

$25 piece of furniture at a yard sale
$3 each of the glass knobs, twelve total (inspiration knobs were $8-10 each)
$13 each, two pints of paint
$10 for the drawer lining
$4 for a household grade of 3M spray adhesive. 
The shellac primer was definitely the most costly investment at $40/gallon. 

I'm loosely calculating the total, as the adhesive, remaining paint and shellac primer will all be used for future projects. 

Tuesday, July 16, 2013

Happily Ever After...

Don't urge me to leave you or turn back from you. Where you go I will go, and where you stay I will stay. Your people will be my people and your God my God. Ruth 1:16

I cannot believe it has come and gone. That is, the wedding, of course! If you follow me on facebook or instagram, you know that our special day was one right out of a fairy tale (okay okay, my opinion mayyyy be a little biased). As I planned, I knew that I wanted to look back and not have one single regret. I didn't want to think, oh I wish I had just gone ahead and done (insert xyz)... Well, I can say that my mission was accomplished and then some! Thanks to Ashley and her amazing crew at WED Charleston with special help from Luke and Brooke, Charlie and I had the most amazing wedding e.v.e.r. We're waiting to get everything back from our photographer Nadean with Gene Ho Photography who was AMAZING, so I can share my favorites with my devoted readers, but for now I want to share a zillion few of our best shots from the honeymoon!

As if the wedding wasn't all that I could've hoped for, Charlie really spoiled me with the most fabulous gorgeous incredible amazing spectacular fantastic honeymoon of all time! We decided to rest and recoup in Charleston for a few days before leaving for Antigua the Wednesday following the wedding weekend. Best decision of all time. I don't want to be one of those brides who thinks she knows everything about wedding planning, but if I can give one piece of advice, give yourself a couple days of staycation before you leave for the main event. We were well rested, well packed and ready to go by Wednesday morning. Not to mention, once we got to Antigua the trip seemed so much longer !


Scooped up at the airport and taken to the resort dock where a private ferry picked us up on the main island and took us to Jumby Bay, a private island off the coast of Antigua. View from the front of the ferry as we approached Long Island, home of Jumby Bay Resort!


Welcome spread waiting for us when we got to our ocean front suite!


Yum!


So sweet!


Local Antiguan food served our first night at Jumby Bay, complete with ocean view of course!


First picture together in Antigua as Mr. and Mrs. Horton!


suite 38


private courtyard outside our suite


view off the point


view from our bed


daily breakfast view


daily breakfast view


beach bar


Jumby Bay dock


Daily routine!


These things were everywhere!


Smoothies delivered constantly on the beach! Delish!!


beach view


Take me back! 


sunset cruise


The entire resort was crazy gorgeous!


The island was home to a sugar plantation. This is the view from the top of the old windmill. Off in the distance is the main island of Antigua. 


Rum tasting!


view from the porch of our suite


main beach


White night on the main beach for all of the guests.


gorgeous


so. much. food. 


White night!
(excuse the beach blown hair)


We went kayaking, snorkeling and paddle boarding! 
Charlie went kite surfing, but I decided to stay on the beach during that adventure. 


View of the main beach from the circumnavigation tour around the island. 


There were no cars on the island so all guests had beach cruisers to ride around the island. Luckily, there were golf carts that could drive guests around if you were all dolled up for dinner!


Pool with an ocean view!


Charlie planned the most amazing surprise, private dinner on the beach for us! 


And I had planned one for him on the porch of our suite!


Gorgeous sunset from our private dinner!


beach view on our morning ride to breakfast


view from the verandah bar


Goodbye Jumby Bay!


We weren't ready to leave!

Words cannot express how grateful I am to my amazing Mom and Dad for giving me a day fit for a princess. Our wedding was a day that I will never forget and it is impossible to show them how thankful I am to have them as parents. If you know me personally, you know how obsessed I am with them both!
Thank you Cha for giving us the most amazing honeymoon that I could've ever dreamed of. It was a trip that I will never forget and will never be topped. My hat is off to you, sir!

Our wedding, staycation and honeymoon were straight out of a movie. I am incredibly blessed. 

Now, we're back in the real world... We're anxiously waiting for Lis and Matt's house to be done so that we can move into our house (see previous posts if you're out of the loop). Let the renovations begin! Stay tuned for my projects and my attempts to DIY!